


Quick answer: Coffee cupping is the Specialty Coffee Association's standardized tasting method: 8.25 g of medium-coarse ground coffee per 150 ml of 93°C water, steeped 4 minutes, crust broken and skimmed, then slurped from a cupping spoon to coat the whole palate. Scoring runs from 6.00 to 10.00; 80 points or above qualifies as specialty coffee. You can run your first session at home in under an hour with four cups and a kitchen kettle.
If you've sat through your first cupping and wondered why the Q-grader next to you kept writing down "black currant" and "dried apricot" while you were getting "tastes like coffee" -- that gap closes faster than you'd expect. The difference isn't a special gift for tasting. It's practice, structure, and knowing what to pay attention to.
What coffee cupping actually is
Cupping is the coffee industry's standardized evaluation method. Coffee buyers, roasters, and Q-graders use it to assess quality, identify defects, and describe flavor before a lot is purchased or a blend is finalized. It's been a formal industry practice for well over a century -- the SCA's current written protocols trace back to SCAA procedures developed in the 1980s and 1990s, with roots in export-house tasting practices that predate the 20th century.
For home enthusiasts, cupping does something nothing else does quite as well: it puts two or three coffees on the table at the same time, under identical conditions, so the differences between them become impossible to miss. You stop tasting in isolation and start tasting in contrast. That's when flavor vocabulary actually starts to build.
What you're evaluating
The SCA cupping form scores ten attributes: fragrance/aroma, flavor, aftertaste, acidity, body, balance, uniformity, clean cup, sweetness, and overall. Each gets a score on a 6.00 to 10.00 scale; the ten scores combine for a final total. Coffees scoring 80 or above are classified as specialty grade.
One thing that trips people up: you're not looking for what you like. You're looking for what's there. A lot of beginning cuppers score everything low because they're secretly marking it down for not tasting like the espresso they're used to. The evaluative posture is neutral curiosity, not preference-based judgment.
The SCA cupping protocol, step by step
The SCA's published protocol is precise enough that two cuppers in different countries can run comparable sessions. Here's what it requires.
Examine the beans and dry grounds
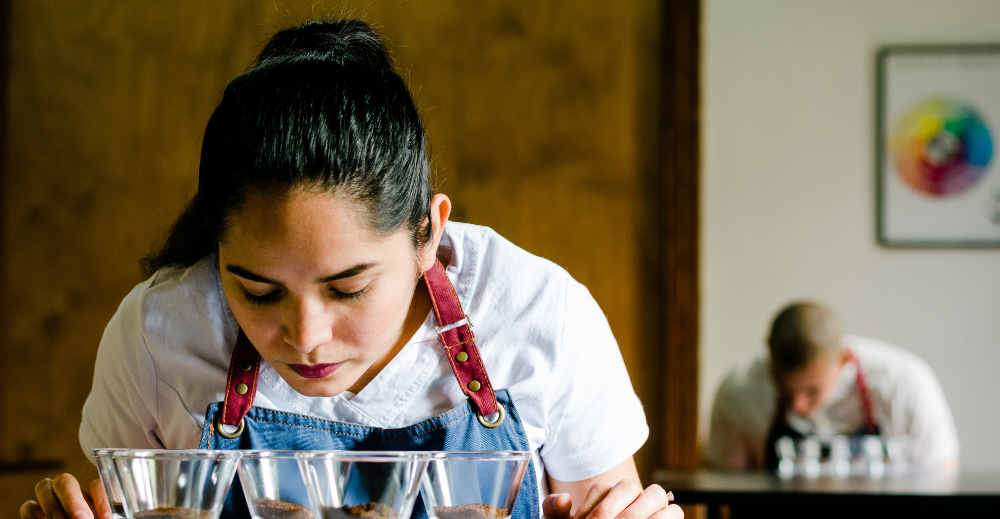
Look at the roasted beans before you grind them. Color uniformity tells you whether the roast was consistent. Quakers (pale, underdeveloped beans) show up clearly here and signal a problem before water touches the cup. Then grind to a medium-coarse setting -- slightly coarser than drip -- and smell the dry grounds immediately. This is the fragrance score on the form. It fades in about 15 minutes, so don't delay.
Brew
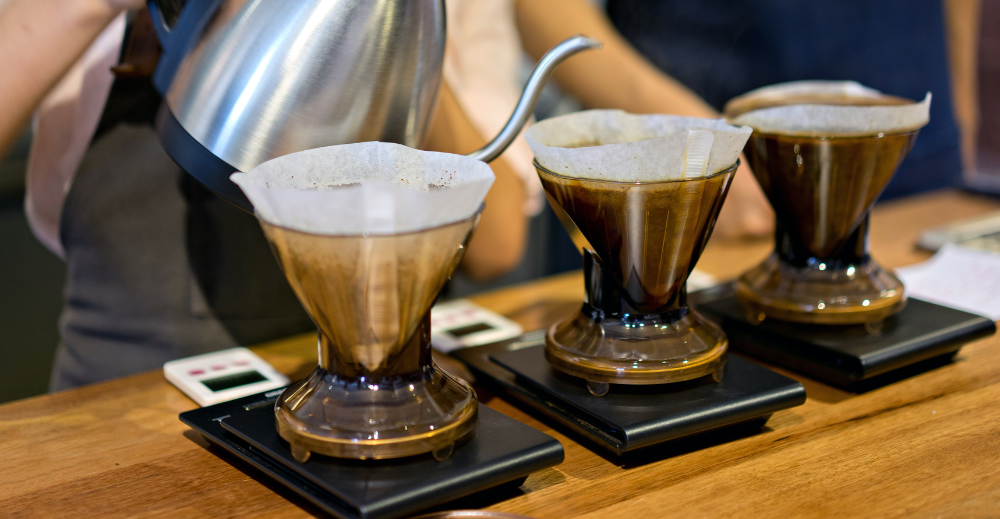
Pour 93°C (200°F) water over the grounds, saturating them completely. The SCA ratio is 8.25 g of coffee per 150 ml of water -- weigh it, don't eyeball it. Set a timer for 4 minutes. Do not stir. The grounds form a crust on the surface as CO2 off-gasses from the brew.
Break the crust
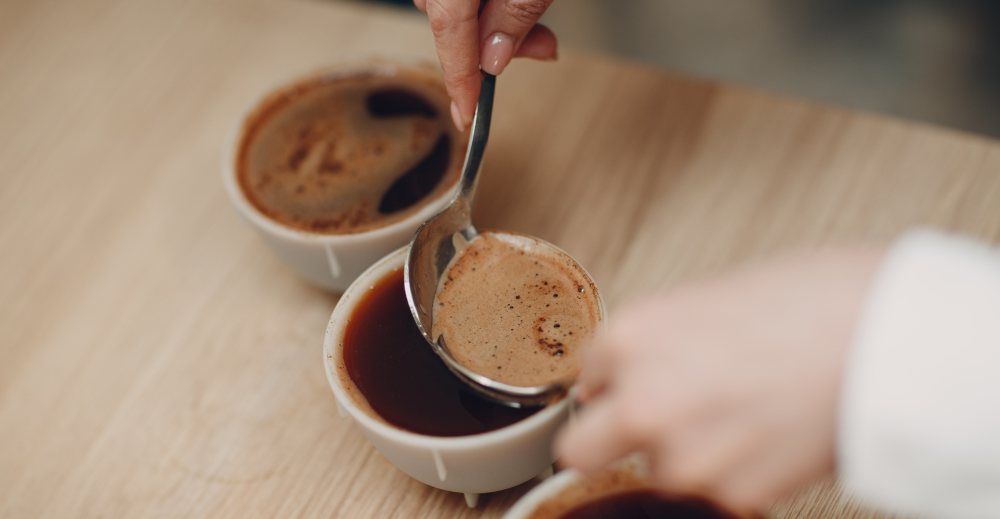
At 4 minutes, push the crust with your cupping spoon, stirring three times while leaning in. This is the aroma score moment. The volatile compounds releasing in that first burst carry more aromatic information than any other point in the process. Skim the grounds from the surface with two spoons and discard them.
Taste
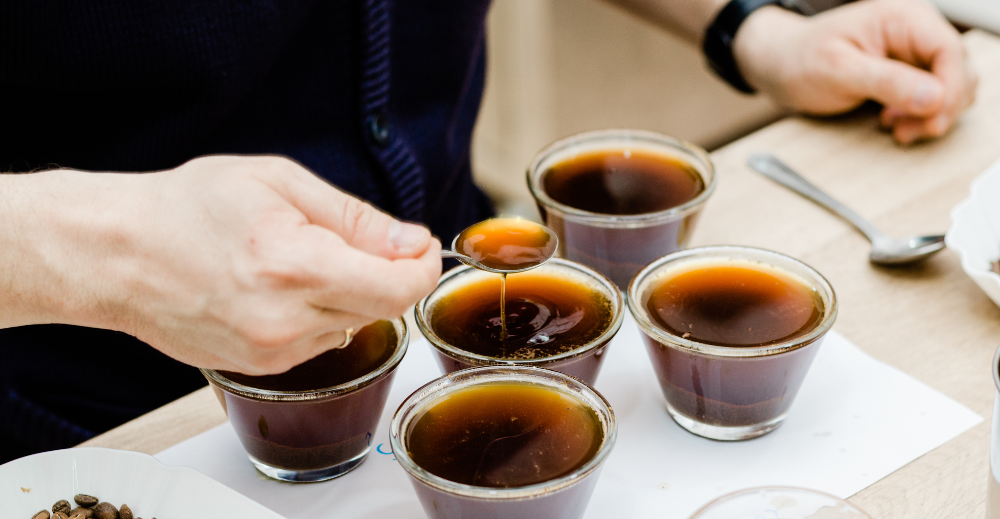
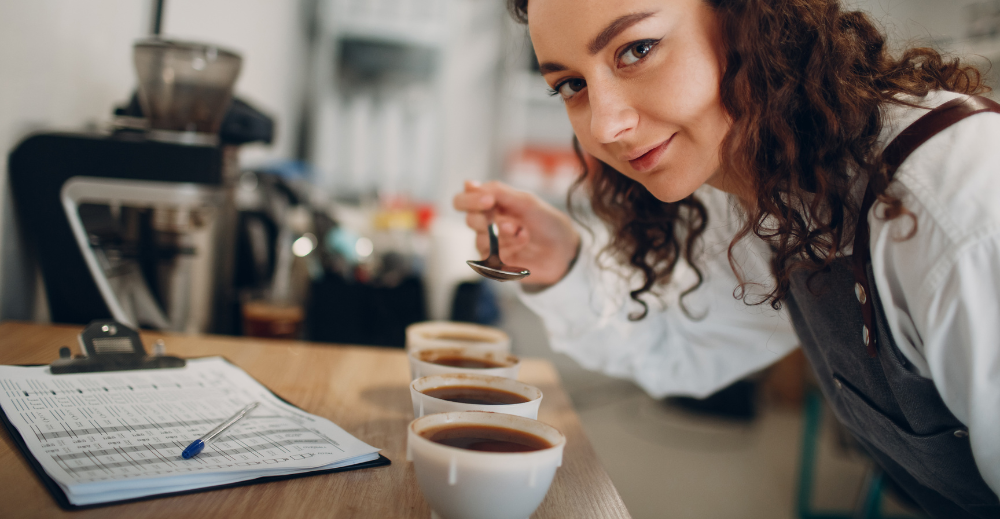
Wait until the coffee drops to roughly 70°C (160°F) -- about 8 to 10 minutes after brewing -- then start tasting. Load your cupping spoon and slurp hard, spraying the coffee across the back of your palate. That's not affectation; the aerosolization carries aromatic compounds to your retronasal passage, where most of what we call "flavor" actually registers. Rinse your spoon between each sample.
Score
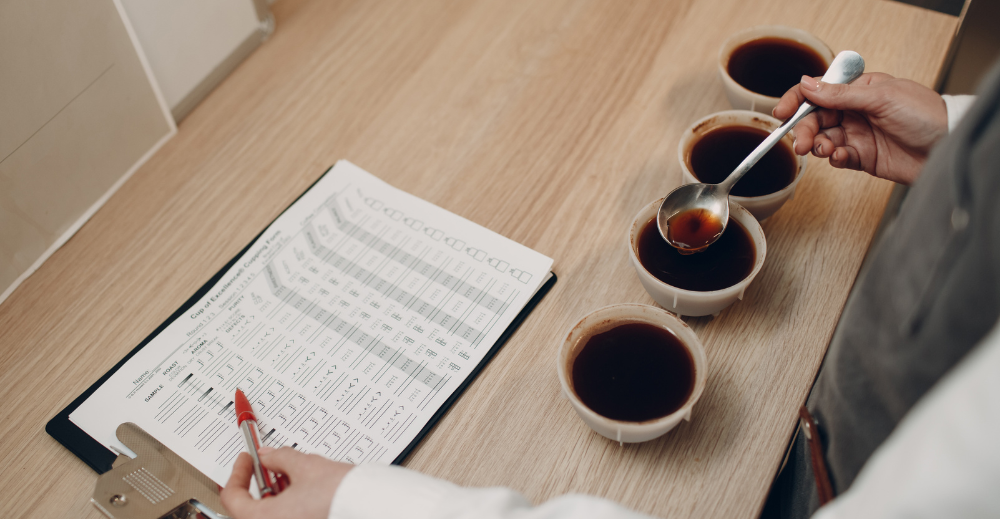
Mark your form while the coffee is still in the evaluation window (approximately 70°C down to 40°C). Keep tasting as it cools -- acidity perception shifts noticeably between 65°C and 45°C on the same cup.
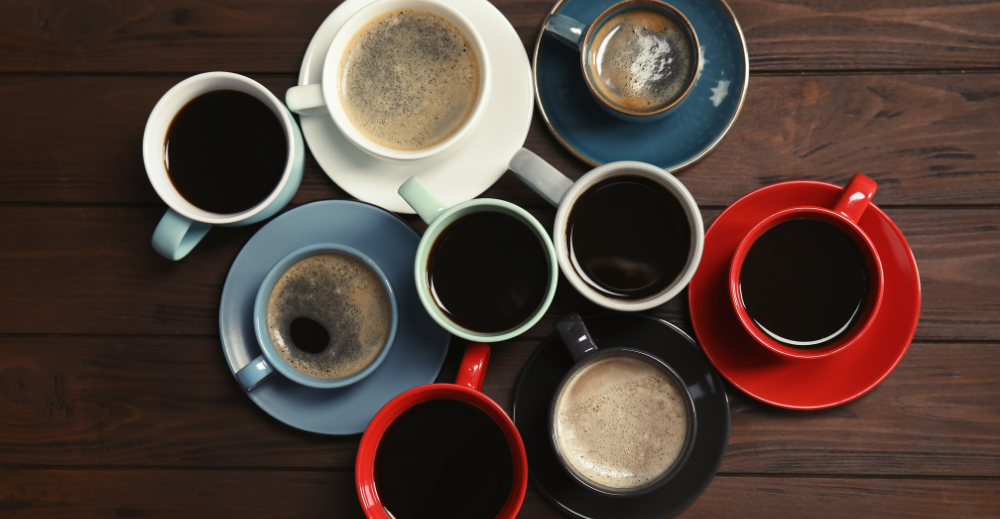
Running your first session at home
You don't need professional cupping bowls to start. Wide-mouthed ceramic mugs work fine. Here's what you actually need and what to do with it.
Equipment list: Three to five mugs of the same size, a kitchen scale that reads to 0.1 g, a gooseneck kettle or any kettle with a thermometer, a kitchen timer, cupping spoons or large soup spoons, a notebook, and a printed SCA cupping form (free download from sca.coffee).
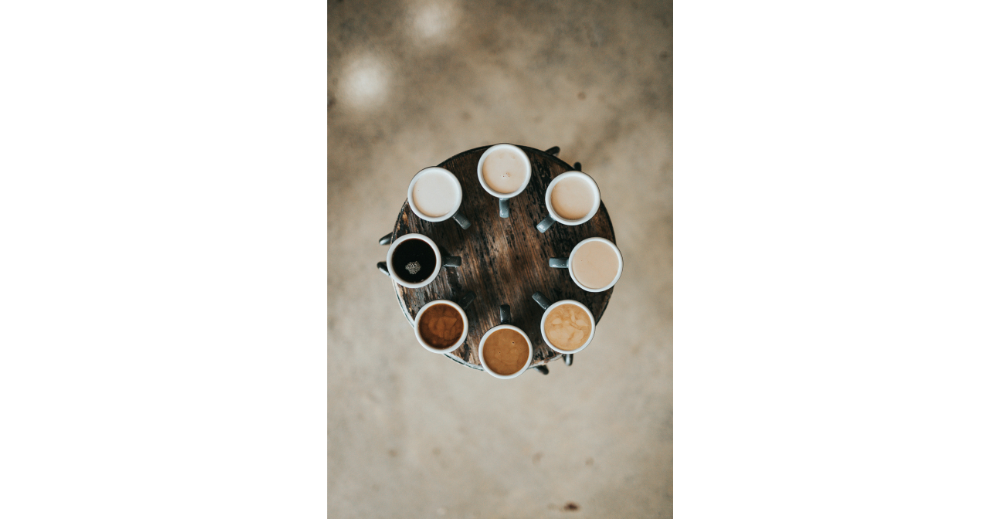
Bean selection: Pick coffees that contrast. A washed Ethiopian (bright, floral, berry-toned) next to a Brazilian natural (low acidity, heavy body) will teach you more in one session than six cups of similar coffees. You can use freshly roasted whole beans ground at home, or pre-ground bags from a local roaster -- just use them within 30 minutes of opening the bag to preserve aromatics. CoffeeRoast Co. stocks home roasters if you want to roast your own greens for cupping.
The first time I set up a home cupping -- three cups, two Ethiopian washed lots and one Guatemalan natural, on a January afternoon in my Chicago kitchen -- I couldn't tell the two Ethiopians apart. By session four, the difference in fermentation character between them was obvious. The palate isn't static. It responds to repetition.
Failure mode to know: the most common error in first sessions is inconsistent grind size across samples. If one sample runs coarser than the others, it will taste thinner and less sweet -- not because the coffee is worse, but because surface area affects extraction. Use the same grinder setting for all cups in a session, and don't adjust mid-session.
Why side-by-side comparison accelerates your palate
Tasting one coffee in isolation is hard. Tasting three side by side is much easier. The fruity brightness of an Ethiopian Yirgacheffe stands out the moment you place it next to a low-acid Sumatra Mandheling. That contrast does the conceptual work for you; your brain registers the difference before you've put words to it.
This is why professional buyers cup in flights of 10 to 20 coffees. It's not efficiency. It's epistemology: you can only define "high acidity" by reference to something that has less of it. Start with two contrast coffees per session, add a third once you can reliably distinguish the first two.
Keep a tasting journal from session one. Write down origin, processing method, and roast date along with your notes on fragrance, aroma, flavor, and aftertaste. Paper works fine. If you want a digital system, Cropster's cupping log (cropster.com) is the industry standard -- though it's built for commercial roasters and is probably more than a home cupper needs. A spiral notebook does the job.
Advanced tips for faster palate development
These aren't beginner tips. They're the habits that separate people who cup casually for a few months from people who actually build a useful palate.
Taste blind. Once you know the protocol, ask someone to set up your cups and label them with numbers instead of origins. Your brain adjusts scores based on expectation -- knowing you're tasting a $40/lb single-origin lot from a famous Kenyan washing station makes the cup taste better before it hits your palate. Blind evaluation removes that bias and forces honest scoring.
Reference the SCA Flavor Wheel. The wheel (sca.coffee) organizes descriptors hierarchically: "fruity" at the outer ring, then "berry" and "dried fruit" in the middle, with "blackcurrant" and "raisin" at the inner level. Use it during tasting, not after. Reaching for specific language while the cup is still in your mouth is the habit that builds vocabulary fastest.
Cup the same coffee twice. Roast the same green lot at two different levels -- say, City and Full City -- and cup them side by side. The same origin presenting with different development times is one of the clearest ways to see what roast does to flavor without the confound of different varietals or terroirs. CoffeeRoast Co.'s guide to the coffee bean roasting curve covers what's actually happening in the drum between those two roast levels.
Attend SCA cuppings. The SCA hosts public cupping events at their regional chapters and at trade shows. Tasting next to experienced Q-graders and hearing their verbal notes out loud -- in real time, on the same cup -- is worth more than any written guide. Look up your nearest SCA chapter at sca.coffee/events.
Cleanse your palate properly. Plain sparkling water works better than still water because the slight acidity resets your palate faster between samples. Avoid eating within an hour of cupping; mints and spicy food within two hours as well. These aren't superstitions -- they're the same precautions Q-grader exam candidates take.
One last thing: don't obsess over scoring. The number on the form is less useful than the language you develop to get there. A cupper who can say "the acidity is citric, hits mid-palate, and fades quickly without lingering" has learned more than a cupper who confidently assigns 8.25 to the acidity attribute and moves on.
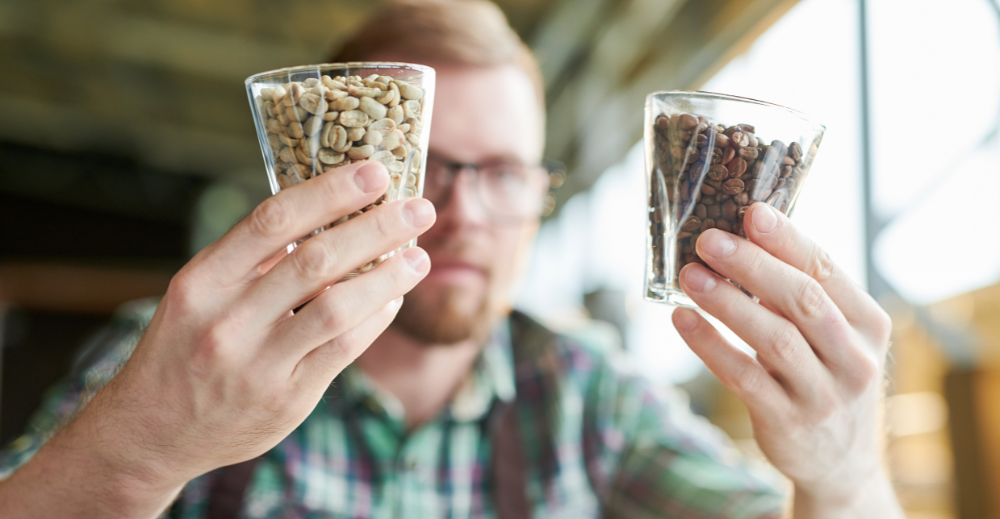
For green beans to roast yourself before cupping, the guide to choosing green beans to roast covers origin and processing trade-offs worth knowing before you build a cupping flight. If you need roasting equipment, CoffeeRoast Co. carries the full range from entry-level air roasters to compact drum machines.
Frequently asked questions
What equipment do I need to cup coffee at home?
Three to five wide-mouthed mugs of the same size, a scale accurate to 0.1 g, a kettle with a thermometer, cupping spoons or large soup spoons, a timer, and a notebook. Professional cupping bowls (typically 207 ml ceramic with flat bottoms) are nice but not required. Spend the money on quality, freshly roasted beans before you spend it on equipment.
What is the SCA cupping ratio?
8.25 grams of ground coffee per 150 ml of water, brewed at 93°C (200°F) and steeped for exactly 4 minutes before breaking the crust. This ratio is specified in the SCA Cupping Protocols (sca.coffee) and is used by Q-graders and professional buyers worldwide to ensure comparable evaluations.
How long does it take to develop a trained palate?
Most cuppers report noticing consistent improvement after 10 to 15 dedicated sessions over two to three months -- roughly one session per week. The jump from "tastes like coffee" to reliably distinguishing brightness levels and body happens in the first month. Specific descriptor vocabulary (blackcurrant vs. blueberry, citric vs. malic acidity) takes longer and responds to using the SCA Flavor Wheel actively during tasting rather than referencing it afterward.
What's the difference between cupping and regular coffee tasting?
Cupping follows a fixed protocol -- same ratio, same temperature, same brew method across all samples -- so the only variable is the coffee itself. Regular tasting lets brewing variables like grind, temperature, and pour confuse the result. Cupping also evaluates multiple coffees in the same session, which lets contrast do the analytical work.
Why do you slurp coffee during cupping?
Slurping sprays the coffee into a fine mist across your entire palate and drives it into your retronasal passage, where olfactory receptors register most of what we call flavor. A quiet sip sends the liquid mostly over the front and middle of the tongue; slurping extends coverage to the sides and back and adds the nasal aromatic component. It's the fastest path from spoon to full sensory evaluation.
Should I use a cupping form?
Yes, at least until your vocabulary is solid. The SCA cupping form structures your observation into ten specific attributes: fragrance/aroma, flavor, aftertaste, acidity, body, balance, uniformity, clean cup, sweetness, and overall. Working through it attribute by attribute forces you to pay attention to things you'd otherwise process as a blur. Download the form free from sca.coffee.
How does roast level affect cupping results?
Lighter roasts tend to show higher perceived acidity and more origin-specific fruit and floral notes, because Maillard and caramelization reactions haven't yet masked the compounds from the green bean. Darker roasts develop bittersweet, chocolatey, and roasty notes as those origin characteristics recede. Cupping the same origin at two different roast levels is one of the most instructive exercises available to a developing palate.
Key takeaways:
- The SCA protocol calls for 8.25 g of coffee per 150 ml of 93°C water, steeped 4 minutes, crust broken and skimmed, then slurped once the cup drops to ~70°C.
- Coffees scoring 80 or above on the 6.00 to 10.00 SCA scale qualify as specialty grade. The ten scored attributes include fragrance, flavor, aftertaste, acidity, body, balance, uniformity, clean cup, sweetness, and overall.
- Side-by-side comparison accelerates palate development faster than tasting single coffees in sequence -- contrast makes difference visible.
- Keep a tasting journal from session one; written descriptor language is the output that compounds across sessions and builds long-term palate memory.
- Blind tasting removes expectation bias and produces more honest scores; introduce it once you're comfortable with the protocol.


Shumbusho saidi
febrero 13, 2024
Hello
I’m shumbusho saidi from Rwanda I’m barista