


Quick answer: Set your grind size first (coarse for French press, medium-fine for pour-over, fine for espresso), add 15–20 g of whole beans to the hopper, and turn the crank in steady clockwise rotations until the grounds chamber is full. The whole process takes 1–3 minutes depending on grind size. Burr grinders produce a more even particle size than blade grinders, which means more consistent extraction and better-tasting coffee.
If you've cranked through a full dose of beans and ended up with something that looks like half powder, half gravel, the grind setting was almost certainly wrong for your brew method. That one adjustment changes everything else. Get it right before you load a single bean, and the rest is pretty intuitive.
What are the parts of a manual coffee grinder?
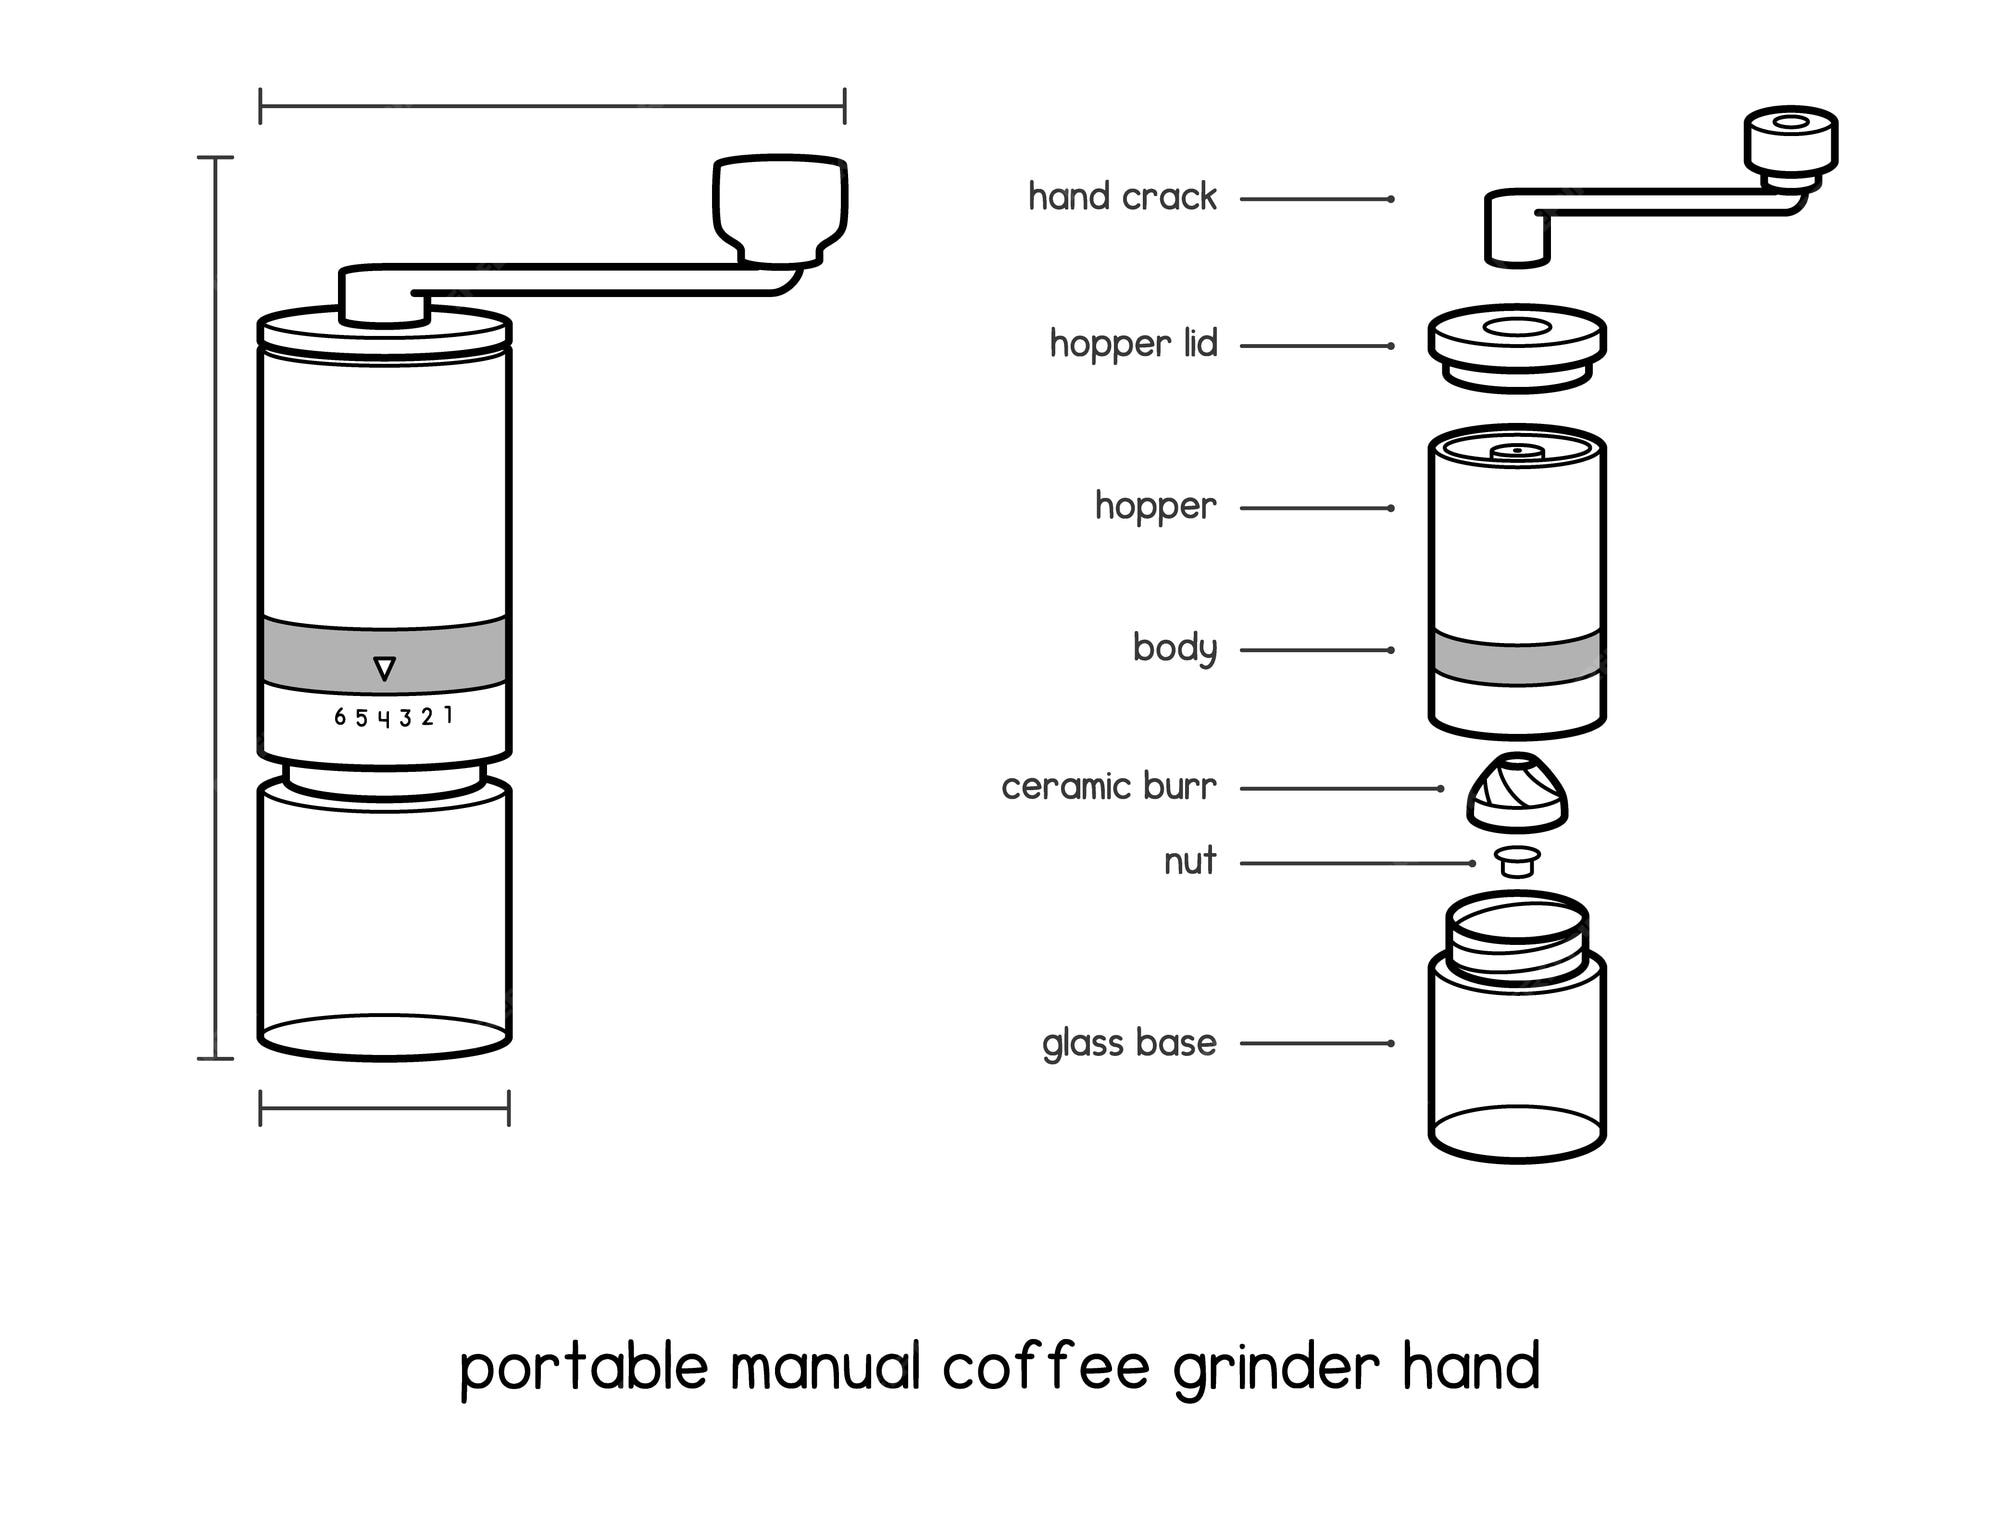
Every manual burr grinder shares the same four core components. Knowing what each one actually does will serve you better than memorizing a spec sheet.

Burr mechanism

Two precision burrs — usually stainless steel or ceramic — sit facing each other with a fixed gap between them. Beans feed through that gap when you turn the handle and get crushed into particles. The gap is what determines your grind size. This is also why burr grinders beat blade grinders: the gap is controlled and consistent, while a blade grinder just chops randomly, leaving you with a mix of fine dust and coarse chunks that extract at completely different rates.
Adjustment dial

This knob or dial opens and closes the gap between the burrs. Clockwise tightens the gap and makes the grind finer; counterclockwise opens it up for coarser output. Most grinders have numbered click stops so you can return to a setting that worked. I'd genuinely recommend writing down the click number the first time you pull a shot you're happy with. You'll want that reference.

Handle and crank

The handle transfers your motion directly to the burr axle. A well-designed crank sits at a natural angle and doesn't flex under load. If yours wobbles mid-session, the most likely cause is a handle collar that isn't fully seated on the axle. It's the most common assembly issue on budget models, and it's an easy fix — just reseat and snug it down before you start cranking.
Grounds chamber

The jar or drawer below the burrs that catches your finished grounds. On most hand grinders it unscrews from the body, which makes pouring directly into a portafilter or French press much cleaner than trying to scoop. Glass chambers are especially handy because you can see exactly how much you've ground without stopping to check.
How do you choose the right grind size?
Grind size controls how fast water moves through your coffee bed — and therefore how much flavor it picks up along the way. Too coarse and water rushes through before extracting sweetness. Too fine and it stalls, pulling bitter compounds. Here's the working map:
| Brewing method | Grind size | Visual reference | Why |
|---|---|---|---|
| French press | Coarse | Coarse sea salt | Long steep (4 min) needs slow extraction; fine grounds make it bitter and muddy |
| Cold brew | Coarse | Coarse sea salt | 12–24 hour steep; fine grounds over-extract and turn harsh |
| Aeropress | Medium to medium-fine | Table salt | Short brew time (1–3 min); adjust finer for shorter press, coarser for longer |
| Pour-over (V60, Chemex) | Medium-fine | Granulated sugar | Target 3–4 min total brew; too fine chokes the filter, too coarse runs fast and tastes weak |
| Espresso | Fine | Powdered sugar | 9 bar of pressure needs resistance from a tight grind to build proper extraction |
Think of these as your starting point, not your destination. Taste the cup and adjust from there. Sour and thin? Go one click finer. Harsh and bitter? Open it up one click. One change at a time.
How do you use a manual coffee grinder, step by step?
Step 1: Set the grind size
Do this before beans go in. Adjusting the dial with a loaded hopper can jam the burrs or snap the setting mechanism on some grinders. Start at the coarsest end of the dial range and click inward until you reach the size your brew method needs. If you're genuinely not sure where to start, the middle of the dial range works reasonably well for most pour-over and drip methods — a decent place to begin your first session.
Step 2: Assemble the grinder
Seat the handle fully on the axle and screw the grounds chamber on until it's snug. Then give the whole thing a quick shake. Any rattle or wobble means something's loose — find it and tighten it before you load beans. A burr gap that shifts under load because of a loose joint will give you an uneven grind no matter how carefully you dialed in the setting.
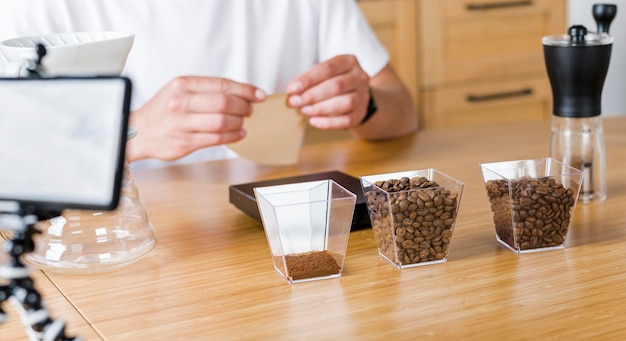
Step 3: Add coffee beans
A 1:16 coffee-to-water ratio by weight is the standard starting point: 15 g of beans for a 240 ml cup, 30 g for a large 480 ml brew. Don't load past the hopper's stated capacity. Overfilling stalls the burrs mid-grind and stresses the axle. Also worth knowing: freshly roasted whole beans grind more cleanly than beans left open for weeks. Older beans get harder and oilier in a way that makes the grind less consistent and the flavor noticeably flatter.
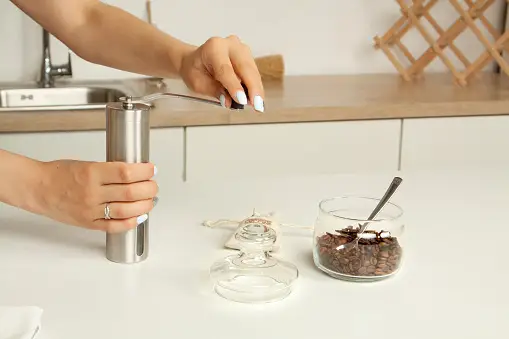
Step 4: Grind the coffee
Hold the body steady with your non-dominant hand and rotate the crank clockwise with your dominant hand. Steady and consistent beats fast every time. Pay attention to how it feels: smooth, firm resistance means the burrs are working cleanly. Gritty or stuttering resistance usually means debris in the burr set, or the setting is too fine for the density of bean you're grinding.
For a medium grind with 20 g of beans, expect about 60–90 seconds of cranking. Espresso-fine takes longer — sometimes 3 minutes — because the tight gap slows how fast beans feed through. That's not a defect. That's just the physics of fine grinding, and it's worth the wait.
Step 5: Collect and use the grounds
Unscrew the grounds chamber slowly. Static electricity can send a small cloud of fine grounds into the air if you move too quickly — ask me how I know. Pour directly into your brewing device or a clean dry container and brew right away if you can. Ground coffee starts losing aromatics within minutes of grinding. That's the whole point of using a hand grinder over pre-ground: freshness. Don't grind and walk away.
How do you clean and maintain a manual coffee grinder?
Coffee oils coat the burrs after every few sessions. Left to accumulate, they go rancid and leave a stale, slightly bitter edge in cups made from even excellent fresh beans. Most home grinder users hit this wall around 3–4 weeks of daily use and can't figure out why their coffee suddenly tastes off. The burrs are usually the answer.
After each use, tap the body against your palm to knock loose grounds free from the burr set, then brush out the rest with a small stiff-bristled brush. Don't rinse burrs with water unless the manufacturer explicitly confirms they're waterproof. The axle bearings on many grinders will rust if water reaches them.
Every two to four weeks, do a deeper clean:
- Disassemble the grinder down to the individual burr discs.
- Brush the burr surfaces clean with a dry stiff brush.
- Wipe the grounds chamber with a dry cloth.
- Run a tablespoon of uncooked rice through the burrs at the coarsest setting to absorb residual oils, then discard the ground rice. This works better than most "grinder cleaning tablets" and costs nothing.
- Reassemble and grind a small sacrificial dose of your actual beans before brewing, to clear out any rice dust.
Every few months, look at the burr surfaces for chipping or visible dullness. Ceramic burrs are harder than stainless but chip more easily if a small stone sneaks in with your beans. A chipped burr produces uneven particles at every setting — no amount of adjustment fixes that. Replace the burrs if you see damage.
What should you do if your manual grinder isn't working right?
Uneven grind size
Check that both burrs are seated and tightened correctly — misalignment is the most common culprit here. Also look at how fast you're cranking: grinding too quickly with a heavy bean load can let particles slip through before the burrs fully process them. Slow down and see if that helps before you start swapping settings.
Hard to crank or grinding feels stuck
The grind is probably too fine for the density of bean you're using. Open the adjustment one or two clicks coarser and try again. If it's still fighting you, disassemble and check for a rogue bean fragment or piece of debris wedged between the burrs. It happens more often than you'd think.
Excessive wobbling
Tighten the handle collar where it meets the axle. If the wobble doesn't go away after that, inspect the axle shaft itself for a bend. This usually happens when someone forces a jammed grinder rather than stopping to clear the blockage first. Stop before you force it.
Inconsistent grind from session to session
Reset to the coarsest setting, then click inward to your target and write down the click count. If that number drifts between sessions on its own, the adjustment lock nut has come loose. Tighten it with the small hex key that most quality grinders include. The Kinu M47's stepless adjustment system addresses this directly — the magnetic click mechanism holds position reliably between sessions without needing a separate lock nut.
Recommended manual grinders from CoffeeRoast Co.
Two grinders in the CoffeeRoast Co. lineup cover most use cases well. Here's what I'd tell you about each one.
Kinu M47 Classic Manual Coffee Bean Grinder

Made in Germany with a 47mm Black Fusion-coated conical burr set. Dimensions: 25.5 cm × 19 cm × 12.5 cm. Weight: 1.85 kg. Batch capacity: up to 35 g. The stepless grind adjustment is what sets this apart. Because you're not locked to fixed click stops, you can make micro-adjustments that actually matter for espresso, where a tiny gap change shifts extraction noticeably. If dialing in espresso at home is your main goal and you want a setting that holds reliably between sessions, this is the right tool. It handles pour-over and filter beautifully too, though at 1.85 kg it's not something I'd pack in a carry-on.
One thing to know about the Kinu: the axle bearing is tight-tolerance. If you feel resistance while cranking, stop. Don't force it. Disassemble and clear whatever's blocking before you continue. Forcing a jammed Kinu can warp the bearing seat, and that's an expensive repair on a precision grinder.
Sandbox Smart G1 Coffee Bean Grinder
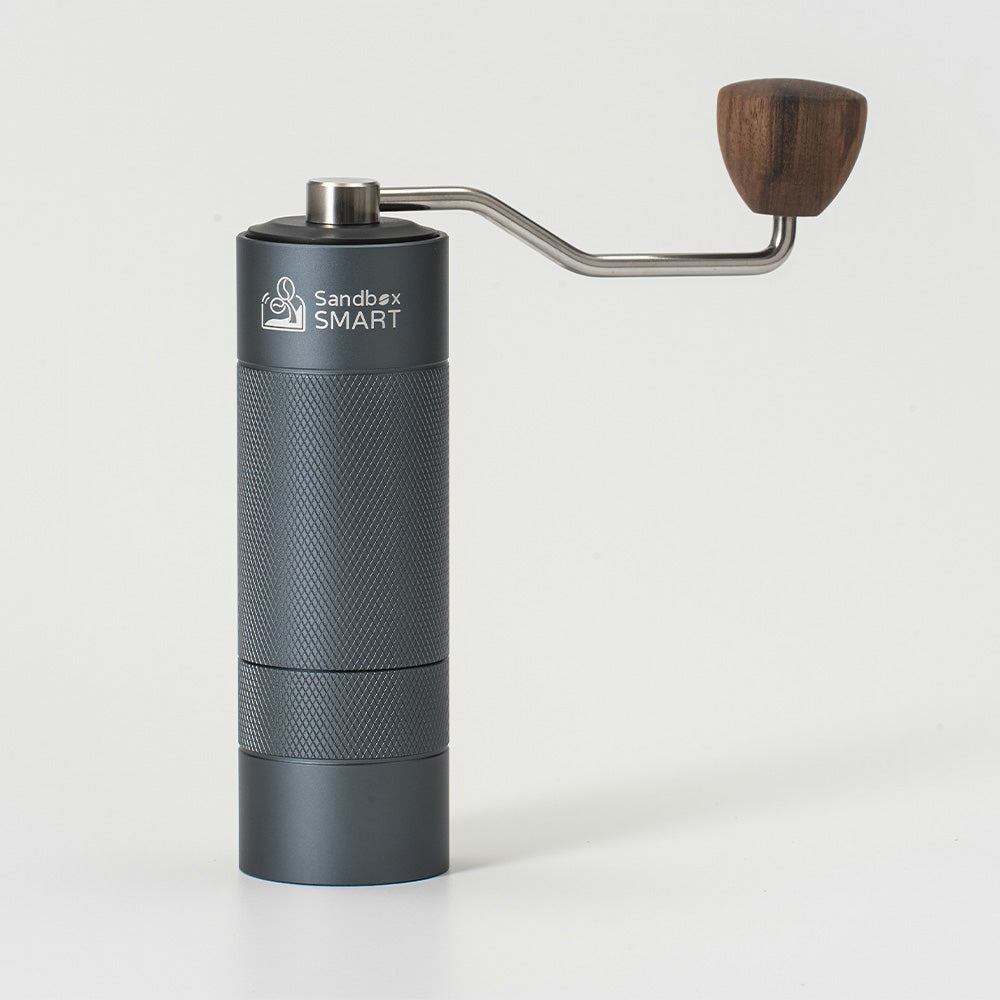
A 38mm stainless steel conical burr grinder with a natural wooden handle. Weight: 1.5 kg. Dimensions: 20.5 cm × 19 cm × 7 cm. Batch capacity: 35 g. It's lighter and more compact than the Kinu, which makes it a more practical travel companion. The wooden handle won't be everyone's aesthetic, but it sits well in hand and doesn't conduct heat from a warm kitchen surface the way metal does. For pour-over, French press, and Aeropress it's a reliable daily driver. It won't satisfy an espresso purist who needs sub-click adjustability, but for everything else it's clean, consistent, and easy to live with.
Frequently asked questions
How long does it take to grind coffee with a manual grinder?
For a coarse French press grind with 20 g of beans, expect 45–60 seconds. A medium pour-over grind takes about 60–90 seconds for the same dose. Espresso-fine grinds run 2–3 minutes because the tight burr gap slows the feed rate. Burr size matters too: a 47mm burr set like the Kinu M47 moves more coffee per rotation than a 38mm set, so it's faster at the same grind size.
Is a manual coffee grinder better than an electric one?
At the same price point, manual grinders typically deliver better grind consistency than electric ones. They use larger, higher-tolerance burrs and don't have motor vibration shifting the burr position under load. Electric wins on convenience and batch size, no question. But if you're grinding 20–30 g a day and care about what's in the cup, manual is the better value under $300. Above $300, electric flat-burr grinders like the Eureka Mignon Specialita start to close the quality gap meaningfully.
Can I use a manual grinder for espresso?
Yes, but the grinder needs stepless or near-stepless adjustment. Fixed click-stop grinders rarely land exactly where espresso requires — the gap between clicks is just too wide for the precision espresso demands. The Kinu M47 is built for espresso-capable hand grinding. Cheaper click-stop grinders, most under $60, will get you in the neighborhood but not precise enough for a consistently good shot.
Why does my hand-ground coffee taste bitter?
Bitterness usually points to one of three things: the grind is too fine, the water temperature is too high (above 96 °C), or the brew time ran long. Start by opening the grind one click and re-brewing. If it's still bitter, check your brew time against the target for your method — 3–4 minutes for pour-over, 4 minutes for French press. Also worth checking: when were the beans roasted? Beans past 6 weeks off-roast can taste bitter regardless of what you do with the grind setting.
How often should I clean my manual coffee grinder?
A quick brush-out after every use takes about 30 seconds and keeps oil from building up. A full disassembly clean every 2–4 weeks is plenty for daily use. If you're grinding oily dark-roast beans every day, I'd move to weekly deep cleans — that oil coats the burrs faster and goes rancid sooner than you'd expect. The rice-run method (one tablespoon at the coarsest setting, discard the output) is an effective way to absorb residual oils between full cleans.
What's the best coffee-to-water ratio for manual grinding?
The Specialty Coffee Association's Golden Cup standard recommends 55 g of coffee per liter of water for drip brewing, which works out to roughly 1:16 to 1:18 by weight. For a standard 240 ml cup that's 15 g of beans. For a large 360 ml travel mug, 20–22 g. French press is often brewed a touch stronger at 1:15. These are baselines, not rules — taste your cup and adjust from there.
Should I grind coffee right before brewing?
Yes. Ground coffee starts oxidizing within minutes: volatile aromatics escape into the air and CO2 degasses rapidly from the freshly cut surfaces. Grinding immediately before brewing is the single biggest quality advantage a hand grinder gives you over pre-ground. Even a 10-minute gap between grinding and brewing produces a measurably flatter cup at the same extraction parameters. Grind, then brew. That's the whole move.
Key takeaways:
- Set grind size before loading beans: coarse for French press and cold brew, medium-fine for pour-over, fine for espresso.
- Burr grinders produce more consistent particle sizes than blade grinders, which means more even extraction and better flavor.
- A 1:16 coffee-to-water ratio by weight is the standard starting point (15 g beans per 240 ml water).
- Grind immediately before brewing. Aromatics start degrading within minutes of grinding.
- Brush the burrs after every use; do a full disassembly clean every 2–4 weeks to prevent rancid oil buildup.
Article reviewed by the CoffeeRoast Co. Editorial Team. For a deeper look at espresso grinding specifically, see how to grind coffee beans for espresso.


Leave a comment