


Quick answer: The 10 most common home coffee roasting mistakes are ignoring bean density, skipping preheat, misreading first crack, skipping notes, rushing the cool-down, ignoring roast defects, not adjusting for ambient conditions, skipping cupping, neglecting equipment cleaning, and starting with unfamiliar green beans. Fix them in that order and your consistency improves fast.
Most home roasters hit the same wall around batch five or six. The first couple of roasts feel like a win. Then something goes sideways and stays sideways, and you can't figure out why. The problem is almost always one of these ten mistakes, repeated without a log to catch it.
1. Not knowing your green beans
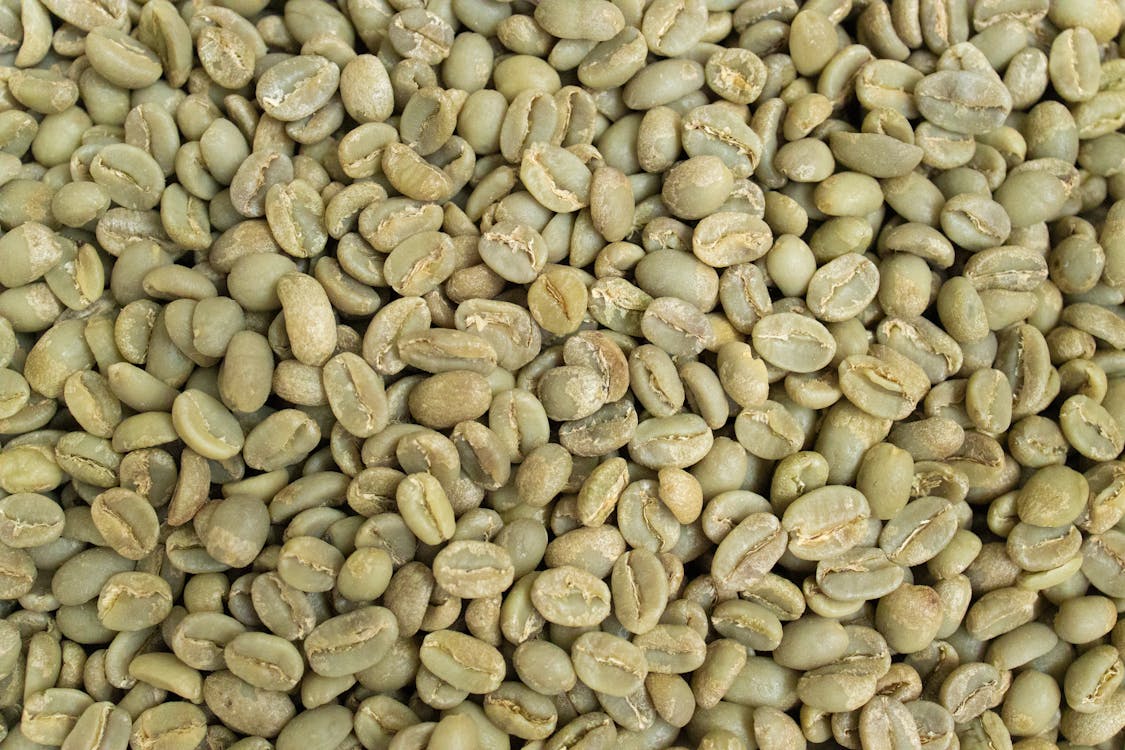
Bean density shapes your entire roast curve before you touch a dial. High-density beans from high-altitude origins like Ethiopian Yirgacheffe or Kenyan SL28 absorb heat slowly in the drying phase, then accelerate through first crack once the cellular structure opens up. Low-density beans like most Brazilian naturals heat fast out of the gate and scorch easily at temperatures that work fine for denser lots.
Processing method matters just as much. A washed Ethiopian and an anaerobic natural from the same farm behave differently in your drum because the natural has more residual sugars that caramelize early. If you are buying green coffee beans without reading the origin data sheet, you are flying without instruments.
The fix: read the lot card before you roast, not after. Look for altitude (higher usually means denser), processing method, and moisture content. Then adjust your charge temperature and rate of rise accordingly.
2. Not understanding how your roasting equipment works
Every roaster transfers heat differently, and getting the heating mechanism wrong is where most scorching happens. An air roaster and a drum roaster are not interchangeable tools running the same process. Air roasters rely almost exclusively on convection; the fan does both heating and agitation. Drum roasters combine conduction (bean-to-drum contact), convection (airflow through the drum), and some radiation from the drum walls.
The failure mode specific to drum roasters is scorching: the drum surface contacts beans directly, so if your charge temperature is too high, you burn the exterior before the interior reaches roasting temperature. The Fresh Roast SR800 and similar fluid-bed units don't have this problem because nothing touches the bean except air. Understanding the parts of your coffee roaster and its specific heat-transfer mechanism tells you where your risks are before you load a single bean.
Run three or four empty cycles on a new machine before you put green coffee in it. Map the temperature at different fan and heat settings. You'll catch hot spots that the manual never mentions.
3. Skipping the preheat

Charge temperature is the temperature inside the roaster the moment you add beans. If you skip preheat, your charge temperature is ambient, and your first 3-4 minutes of roasting are spent just bringing the machine body up to working temperature rather than roasting your beans. The rate-of-rise curve starts late, the drying phase drags, and you end up with an uneven roast that tastes baked and flat.
The preheat window varies by machine. The Gene Cafe CBR-101 needs about 4 minutes at 200 C before charging. The Sandbox Smart R1 in manual mode needs 2-3 minutes at target drum temperature. Check the manufacturer documentation for your specific machine, then add 30 seconds. A cold start on batch one is the most consistent way to ruin an otherwise good roast profile.
4. Misreading first crack
First crack is when the bean's cell walls rupture under steam pressure, producing an audible pop around 196 C / 385 F at the bean surface. It marks the start of the development phase, where the sugars that formed during the Maillard reaction begin to caramelize and the acid structure softens. What happens after first crack determines your roast level.
Here is the timing that actually holds across most machines during the coffee roasting process:
- Light roast: end the roast within 15-30 seconds of first crack starting
- Medium roast: 1-2 minutes after first crack begins
- Dark roast: 3+ minutes after first crack, into or past second crack
The mistake isn't usually missing first crack entirely. It's missing it because the roaster is too loud. The Fresh Roast SR800 runs about 68 dB during peak fan speed, which is loud enough to mask the lighter pops of first crack on naturals with high chaff content. Turn the fan to minimum before you expect first crack, listen for 30 seconds, then bring it back up. You can also feel the drum vibration change slightly on smaller drum roasters.
5. Not taking roast notes
If you don't write it down, you're not roasting. You're just heating beans and hoping. Professional roasters log temperature at least every 30 seconds. At minimum you need: charge temperature, first crack time and temperature, drop time and temperature, batch weight in and out, and any adjustments made mid-roast. The app-enabled machines like the Sandbox Smart R1 log this automatically. If you're on a manual machine, a printed log sheet taped to the wall costs nothing.
The payoff is compounding. After 10 logged roasts, you know exactly which settings produce your preferred development time ratio for a washed Guatemalan versus an Ethiopian natural. Without notes, you repeat the same three mistakes for six months and call it "the learning curve."
6. Rushing the cool-down
Beans don't stop roasting when you pull them from the heat. Residual heat inside the bean mass continues developing flavor for 60-90 seconds after the drop. If you let them sit in a pile, that residual heat keeps working and you end up darker than you wanted. The fix is fast cooling to below 40 C within 4 minutes.
Beyond stopping development, cooling also matters for degassing. Freshly roasted beans release CO2 for 24-72 hours after the roast. Brew too soon and the CO2 interferes with extraction, producing a sour, gassy cup. Spread the beans on a cooling tray immediately after the drop, agitate them for 3-4 minutes until they reach ambient temperature, then store in an airtight container with a one-way valve. Wait at least 12-24 hours before brewing light roasts; dark roasts need a full 24-48 hours to degas enough for clean extraction.
7. Overlooking roast defects

Five defects show up consistently in home roasting. Learn to recognize them visually so you can trace each one back to a fixable cause:
Scorching
Dark, shiny patches on the bean surface, caused by excessive heat early in the roast when beans first contact a hot drum. Lower your charge temperature or reduce batch size. High-density beans from high-altitude origins are most susceptible.
Tipping
Burn marks localized to the pointed tips of the beans. Usually caused by excessive drum speed or uneven heat distribution rather than overall temperature. Reduce drum RPM and lengthen the early portion of your roast profile before adjusting temperature.
Underdevelopment
Grassy or sour flavor in the cup, pale color, no oily sheen. The bean never fully developed past first crack. Extend development time by 20-30 seconds on your next roast. Avoid simply cranking heat, because that risks scorching the exterior before the interior develops.
Quakers
Pale, tan beans in an otherwise well-roasted batch. These are immature or damaged green beans that resist normal development because their starch structure didn't form properly before harvest. Sort your green coffee before charging; quakers tend to be smaller and lighter than the surrounding lot.
Baking
Flat, cardboard-like flavor with no aroma. Happens when beans stall in a low-temperature plateau for too long, usually because the rate of rise dropped to near zero mid-roast. Keep your RoR above 5-8 degrees per minute through the development phase, and make sure the roaster reached adequate charge temperature before loading beans.
8. Ignoring ambient conditions
Your roast profile is written for specific conditions. When those conditions change, your curve changes with them, whether you planned for it or not.
Temperature
A cold garage in January adds significant thermal mass for your roaster to overcome. Add 3-5 C to your charge temperature on days below 10 C ambient, or pre-heat longer. Hot summer days demand the opposite: drop your charge temperature slightly to avoid scorching in the early drying phase.
Humidity
Higher ambient humidity means the beans carry more moisture into the roaster, extending the drying phase. You'll see a later first crack at the same settings you used in dry conditions. Low humidity months can shorten the drying phase enough that first crack arrives 30-60 seconds earlier than expected.
Atmospheric pressure
Higher barometric pressure means denser air, which creates more resistance against your roaster's fan and reduces effective airflow at the same fan speed setting. On high-pressure days, bump fan speed up one step to maintain your target airflow. Lower pressure does the opposite.
Altitude
At altitude, water boils at a lower temperature, which affects the steam pressure inside the bean during drying and development. Roasters in Denver (5,280 ft) or higher typically need to raise target temperatures by 5-10 C compared to sea-level profiles for the same origin and roast level.
9. Skipping cupping

Coffee cupping is the SCA's standardized tasting protocol: 8.25 g of ground coffee to 150 ml of 93 C water, evaluated at 4 and 8 minutes for fragrance, aroma, flavor, aftertaste, acidity, body, balance, and overall. Most home roasters never cup formally. They brew the finished roast on whatever method they use daily and evaluate it that way. That works, but it conflates roast quality with brew variables.
Cup your roasts under the same conditions every time and you isolate the roast as the variable. A grassy cup that you thought was "just this origin" might actually be consistent underdevelopment across three batches. You won't see that pattern without a controlled evaluation method.
10. Forgetting to clean your roaster
Chaff accumulates in every roaster. It's lightweight, flammable, and it coats the probe, the drum, and the airflow path. Old coffee oils go rancid and transfer their flavor to your next roast, especially on machines where the oil contacts a warm surface between batches. A drum that went three months without cleaning smells like old French press on the first roast back.
Clean after every session: brush out chaff, wipe accessible interior surfaces, and check the chaff collector. Every 20-30 batches, do a deep clean of the probe and the drum interior. Chaff in the airflow path is also a fire hazard on any machine with a heat element near the exhaust. CoffeeRoast Co.'s roaster parts guide covers which components to prioritize by machine type.

Frequently asked questions
Why does my home-roasted coffee taste grassy or sour?
Grassy, vegetal, or sour flavors almost always point to underdevelopment. The beans didn't spend enough time in the development phase after first crack. Extend your development time by 20-30 seconds on your next roast. Also check that your rate of rise didn't stall mid-roast, which causes the "baked" variant of underdevelopment with a flat, cardboard taste.
How long should I wait before drinking home-roasted coffee?
At minimum 12 hours; 24-48 hours is better for most roast levels. Freshly roasted beans release CO2 that interferes with extraction, producing a sour, gassy cup. Light roasts degas faster than dark roasts because the cellular structure is less fractured. Most home roasters find the sweet spot for flavor is 3-7 days after the roast.
What is rate of rise (RoR) and why does it matter?
Rate of rise is the speed at which bean temperature increases, measured in degrees per minute. A declining RoR is normal and intentional throughout a roast. A RoR that drops to zero or goes negative mid-roast means your beans are stalling, which causes baked flavor and flat aroma. Keep RoR above 5-8 degrees per minute through the development phase after first crack.
Why does my second batch roast faster than my first?
Your roaster body retains heat from the first batch. The machine, drum, and thermal mass are all warmer when you load batch two, so the drying phase is shorter and first crack arrives earlier. Either extend your cool-down time between batches, lower the charge temperature for subsequent roasts, or log batch-specific notes so you can account for this reliably.
How do I fix scorching on the outside of my beans?
Scorching happens when the drum or air temperature at the charge point is too high relative to the batch size. Lower your charge temperature by 10-15 C and reduce batch size by 10-15%. If you're on a drum roaster, also check that your drum speed is high enough to keep beans moving rather than sitting against a hot surface.
Does roasting at high altitude change my roast profiles?
Yes. At altitude, water inside the bean produces steam at a lower temperature, which shifts when first crack occurs and how the development phase behaves. Roasters above 5,000 feet typically need to raise target temperatures by 5-10 C and sometimes extend development time compared to sea-level profiles. Log your altitude-specific baselines separately from any sea-level references you got online.
How often should I clean my home coffee roaster?
After every roasting session: brush out all chaff and empty the chaff collector. Every 20-30 batches: wipe down the drum interior, clean the temperature probe with a mild solvent, and check the exhaust path for buildup. Chaff accumulation in the airflow path is a fire hazard, especially on machines where the exhaust runs near a heating element.
Can I roast different bean origins using the same profile?
Not reliably. Bean density, processing method, and moisture content all affect how a bean responds to heat. A washed Kenyan at 1,800 meters needs a different rate of rise than a Brazilian natural at 900 meters. Start with a general profile as a reference point, then adjust charge temperature and development time based on the specific lot. Your roast notes will build the origin-specific library over time.
Key takeaways:
- Bean density and processing method determine your starting charge temperature and RoR targets before you touch a dial; read the lot card first.
- Log every roast: charge temp, first crack time and temp, drop time, weight loss, and any mid-roast adjustments. Without notes, you're repeating mistakes invisibly.
- Cool beans to below 40 C within 4 minutes of the drop and wait at least 12-24 hours before brewing to allow CO2 to degas properly.
- The five main defects (scorching, tipping, underdevelopment, quakers, baking) each have a specific fixable cause. Identify which one you have before changing multiple variables at once.
- Ambient conditions shift your curve every session. Track temperature, humidity, and barometric pressure alongside your roast data so you can account for them systematically.
Article reviewed by the CoffeeRoast Co. Editorial Team. Primary references are the SCA cupping protocol and current manufacturer specifications.


Leave a comment