


Quick answer: Preheat your roaster to charge temperature (typically 200–220°C for drum machines), load your green beans, and monitor the roast through three stages: drying, browning (Maillard reaction), and development. Listen for first crack at roughly 196°C to mark the light-to-medium threshold. Drop beans to the cooling tray immediately at your target roast level.
Most first roasts go sideways not because of bad beans, but because the operator doesn't know what to listen for. First crack is your primary signal. Miss it, or misidentify it, and you're either dumping under-developed greens or pushing into bitter territory before you realize what happened. This guide covers the machine, the prep, the roast process itself, and the four failure modes that catch beginners off guard.
Anatomy of a commercial roaster
Before you touch a dial, you need to know what the core components actually do. Commercial machines vary in size from 5 kg batch capacity (a small cafe roaster like the Kaleido M10) up to 60–120 kg production roasters, but the same fundamental parts drive every drum machine.

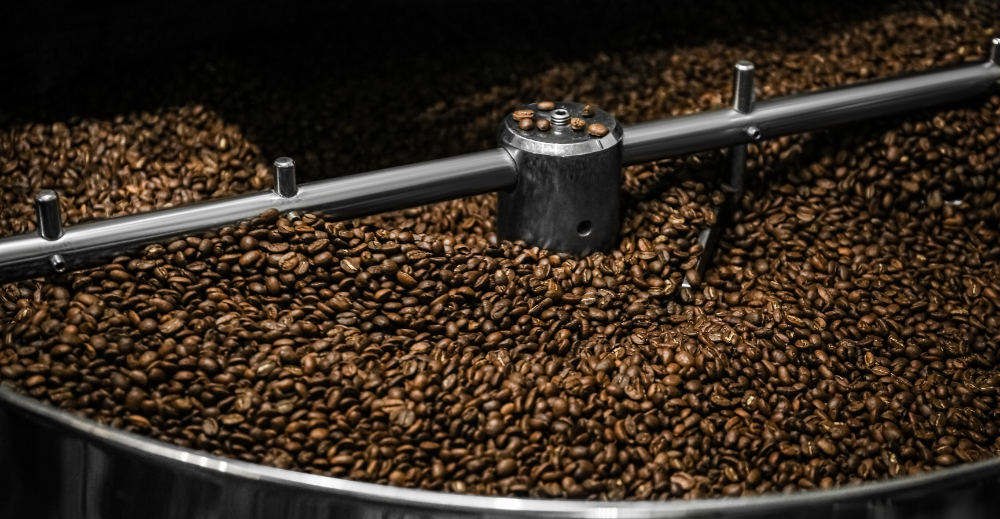
The drum

The drum rotates continuously throughout the roast, tumbling beans so every surface gets even heat exposure. On quality cast-iron drum machines, the drum wall stores heat and acts as a thermal buffer, which is why you preheat before charging beans. Skip the preheat and the beans absorb heat unevenly for the first 90 seconds, producing a ragged drying phase before you've even started the Maillard clock.
The heat source
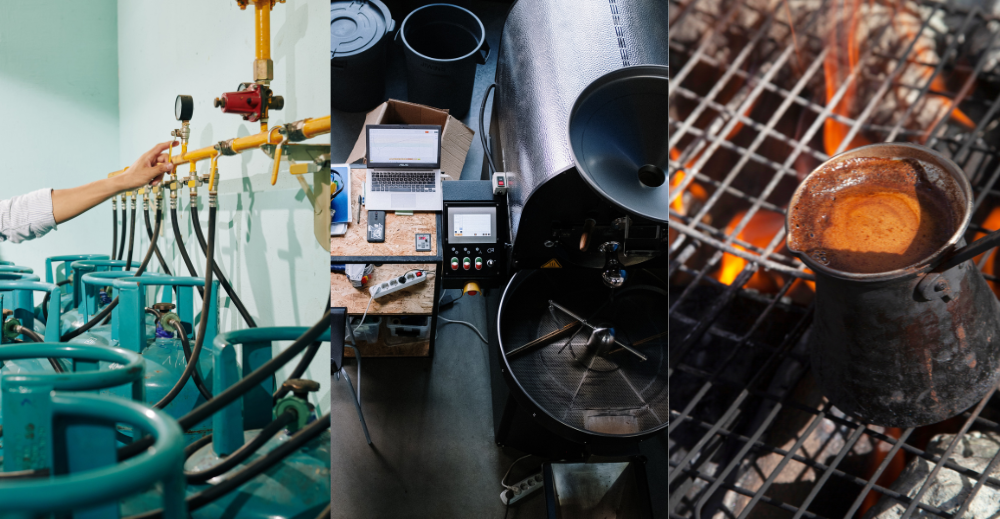
Commercial roasters run on natural gas (most common), electric elements, or infrared burners. Gas gives you fast, responsive heat adjustments and lower operating cost at scale. Electric is cleaner and easier to permit in spaces without gas lines, but slower to react. The heat source determines how quickly you can push or pull the rate-of-rise curve, which is the derivative of bean temperature over time.
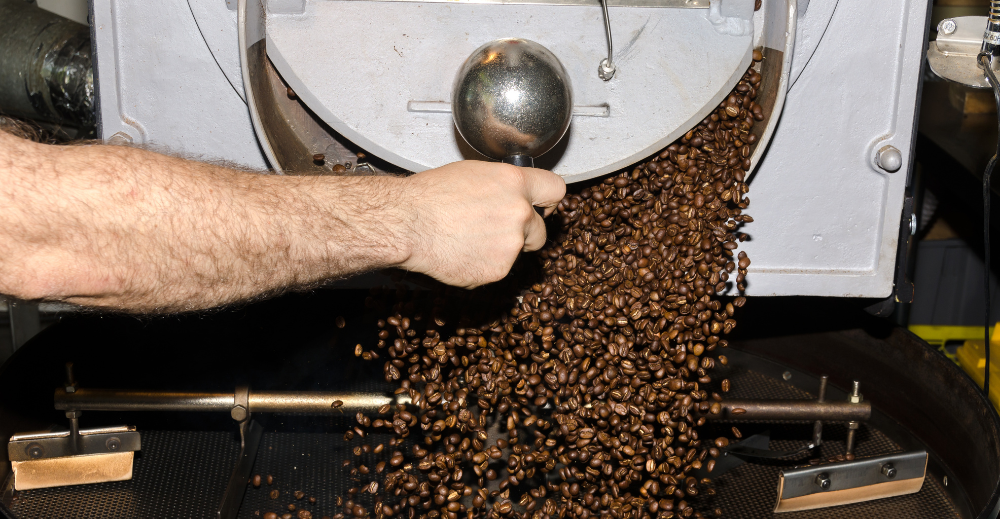
The cooling tray
Beans keep roasting on residual heat for 60–90 seconds after you drop them from the drum. A commercial cooling tray uses an agitator arm and forced-air draw to pull temperature down fast enough to stop development where you intended. If your tray is undersized for your batch weight or the exhaust fan is weak, your beans will coast darker than your target roast level every single time.
How do you prepare before a roast?

Four things to handle before the first bean goes in. Each one has a specific failure mode attached.
- Select your green beans. Origin and processing method determine what roast level makes sense. A washed Ethiopian Yirgacheffe is designed for a light City or City+ roast where floral and fruit notes are intact. Push it to a Vienna and you've thrown away the reason to buy it. A Brazilian natural can handle Full City to Full City+ without flavor loss. Match the bean's intended profile before you set your target temperature.
- Control the environment. Ambient temperature and humidity shift your roast curve. A roastery running 10°C colder than your summer baseline will add 30–60 seconds to the drying phase on the same profile. If you're roasting year-round in a space without climate control, keep seasonal profile notes rather than expecting the same curve to land in January that worked in July.
- Inspect the machine. Check the chaff collector and drum interior for accumulated debris from the last roast. Residual chaff ignites. On gas machines, confirm the gas line valves are fully open and there are no odors around burner connections before ignition. CoffeeRoast Co.'s roasting blog covers machine-specific maintenance schedules for several commercial models if you need a checklist.
- Check your safety equipment. A Type B or Type BC fire extinguisher within arm's reach is non-negotiable. Chaff fires are real and fast. They happen most often during the development phase when the chaff collector is full and the roaster is at peak temperature. Check the extinguisher gauge and keep the path to it clear.
What happens during the roasting process?
A commercial drum roast moves through three distinct phases. Your control inputs and your senses both matter in each one.
Phase 1: Drying (roughly 0–6 minutes)
Green beans contain 8–12% moisture. The drying phase burns that off. Beans turn from deep green to yellow, then to a light tan. You'll smell a grassy, hay-like aroma. No meaningful flavor development happens here. The job is to get beans to around 160°C at the probe without scorching them by applying too much heat too early.
Phase 2: Browning and Maillard reaction (roughly 6–9 minutes)
At around 150–160°C, the Maillard reaction starts. Sugars and amino acids interact to produce hundreds of flavor compounds, and the beans shift from tan to medium brown. The rate-of-rise curve matters most here. A rate-of-rise that drops too steeply (called "stalling") produces flat, baked flavors. Aim to keep the RoR positive through the end of this phase.
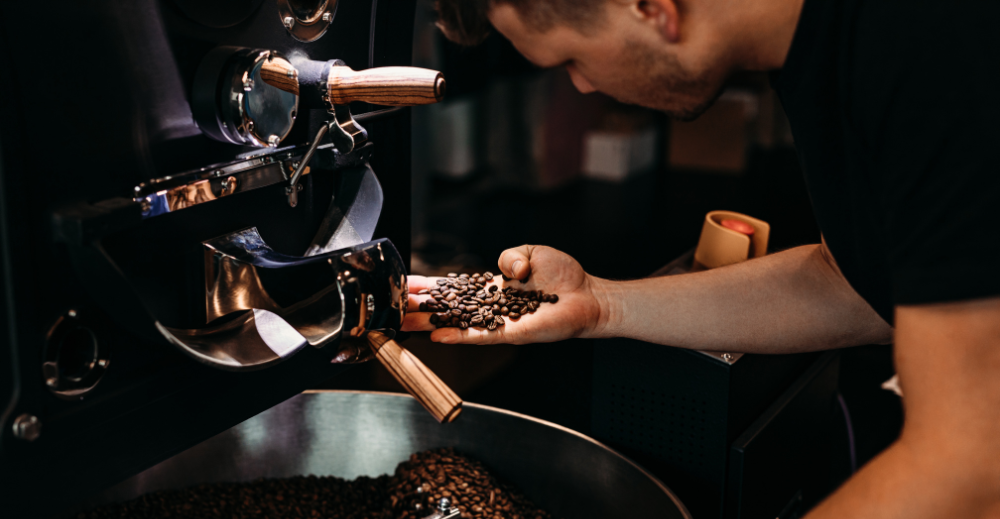
Phase 3: Development (first crack onward)
First crack arrives around 196°C at the bean surface with an audible pop, similar to popcorn but slightly softer. This is the single most important signal in the roast. Dropping beans 30–60 seconds after first crack produces a light roast. Extending development through a rolling first crack produces medium. Holding into second crack—which sounds cracklier and tighter—produces dark and very dark roasts. Your development time ratio (DTR) is the percentage of total roast time spent after first crack. Most specialty coffee targets 20–25% DTR.
How do you adjust temperature, airflow, and time?
These three variables interact. Changing one affects the others. Here's how each one works in practice:
- Temperature (charge temp and burner output). Charge temperature sets your starting conditions. Most commercial drum roasters charge between 180–230°C depending on batch size and bean density. Higher burner output after charge speeds the rate-of-rise. Too aggressive and you scorch the bean exterior before the interior develops. Too conservative and you stall in the Maillard phase.
- Airflow. Airflow controls both heat transfer and chaff removal. Low airflow early in the roast holds heat in the drum and speeds the drying phase. Higher airflow in development removes combustion gases and chaff, which keeps flavors clean. On machines with variable drum speed, drum RPM also affects bean agitation and convective heat transfer.
- Time. Total roast time for a commercial batch typically runs 10–14 minutes, though specialty roasters sometimes run longer on light profiles. The relationship between time and roast level is not linear. Two roasts of the same total length but different airflow and temperature inputs can land at different flavor development levels even if the bean color looks the same.
The practical rule: set your temperature and airflow profile first, then read time as a diagnostic. If your first crack is arriving outside the 8–10 minute window you expected, your charge temperature or early burner output needs adjustment, not your drop time.
What are the most common roasting mistakes?
Four failures account for the majority of bad batches on new commercial machines.
Over-roasting. The most common beginner error. You're watching color and the beans look right, but development has actually run past 30% DTR. The result: dark, oily beans with bitter and ashy notes that bury origin character. Fix is to log your first crack time on every batch and count forward from there, not from total roast time.
Under-roasting. Beans that taste grassy, sour, or cereal-like haven't completed the Maillard reaction. This usually happens when charge temperature is too low or when the operator drops at the first sound of any pop, before true first crack. True first crack is a rolling series of pops, not a single isolated event.
Uneven roasting. When beans of different sizes or densities roast together, the smaller beans develop faster. Sort your greens by screen size before roasting, and don't overload the drum. A 10 kg drum roaster running a 12 kg batch will have beans stacking rather than tumbling, and the bottom layer will scorch while the top under-develops. Stick to 60–80% of rated drum capacity for your first batches.
Chaff fire during development. This one is specific to commercial machines and doesn't get enough attention in beginner guides. At high development temperatures, chaff that accumulates in the collector can ignite. Empty the chaff collector between every batch. Keep the collector clean, the exhaust pathway clear, and the fire extinguisher reachable.
Once you've run 20–30 batches and logged your data, you'll start to see patterns. The machine has a personality. A Kaleido M6 Pro charges and develops differently than a Probat P12 at the same batch weight. Spend the first month learning how your specific machine responds before making significant profile changes between batches. CoffeeRoast Co.'s lineup of commercial and home roasters includes models at several capacity tiers if you're still in the selection phase.
Frequently Asked Questions
What temperature should I preheat a commercial coffee roaster to?
Charge temperature varies by machine design and batch size, but most commercial drum roasters are charged between 180°C and 230°C (356–446°F). Smaller batches and lighter target roasts generally use lower charge temperatures. Check your machine's manufacturer documentation for the recommended charge temp range for your batch weight, then adjust based on your logged results.
How do I know when first crack is happening?
First crack sounds like a rolling series of audible pops, similar to popcorn but slightly lower in pitch. It typically arrives between 8–11 minutes into a commercial roast at 196°C / 385°F at the bean surface. A single isolated pop is not first crack. You're listening for a sustained sequence lasting 30–90 seconds. Your development time begins when first crack starts, not when it ends.
How much should I load into a commercial coffee roaster?
Load 60–80% of the drum's rated capacity for your first batches. A 10 kg drum running 10 kg of green beans won't tumble properly and will roast unevenly. At 6–8 kg, the beans move freely and heat exposure is uniform. Once you understand how the machine responds, you can push toward 85–90% of rated capacity with consistent results.
What is the development time ratio and why does it matter?
Development time ratio (DTR) is the percentage of total roast time that occurs after first crack. Most specialty coffee targets 20–25% DTR for balanced extraction. A roast of 12 minutes total with 2.5 minutes of post-first-crack development has a DTR of about 21%. DTR that's too low produces under-developed flavors; too high produces baked, flat ones.
How do I prevent uneven roasting on a commercial machine?
Three factors drive uneven roasting: batch size overload, mixed bean screen sizes, and inconsistent drum speed. Keep batch weight at 60–80% of drum capacity. Source green beans sorted to a consistent screen size (screen 15 or 16 for most washed Africans, screen 17–18 for larger Central American beans). If your drum has variable speed, run it at manufacturer-recommended RPM rather than adjusting during the roast until you're experienced.
How often should I clean a commercial coffee roaster?
Empty the chaff collector after every single batch. Clean the drum interior and exhaust pathway every 10–15 batches. Inspect and clean the burner assembly monthly. Commercial machines accumulate roasting oils in the drum and exhaust that can affect flavor and, at high temperatures, create fire risk. Follow the manufacturer's maintenance schedule; for most 5–15 kg commercial machines, that means a full teardown and inspection every 200–300 hours of roasting time.
What's the difference between first crack and second crack?
First crack is an exothermic event where steam pressure breaks through the bean's cell walls, producing a lower-pitched rolling pop. It marks the beginning of light-to-medium roast territory. Second crack occurs at approximately 224°C / 435°F and sounds crisper and denser. Beans entering second crack produce oils on the surface and move toward dark roast profiles. Stopping between first and second crack gives you the full medium-to-dark spectrum.
Can I roast different bean origins together in one batch?
Not recommended for beginners. Different origins have different moisture content, density, and screen size, which means they develop at different rates in the drum. Blending post-roast gives you better control over individual components. Once you have 50–100 batches logged and understand how each origin responds on your specific machine, you can experiment with pre-roast blends using origins with similar density and screen size profiles.
Key takeaways:
- Preheat the drum to charge temperature before loading beans; skipping this produces an uneven drying phase that you can't correct later.
- First crack at roughly 196°C is your primary timing signal. Development time ratio (DTR) from first crack is more reliable than total roast time for hitting your target roast level.
- Load at 60–80% of rated drum capacity on your first batches. Overloading prevents proper tumbling and causes uneven development.
- Empty the chaff collector after every batch. Chaff fires are the most preventable safety failure in commercial coffee roasting.
- Log every roast: charge temp, first crack time, drop time, batch weight, and origin. The data from your first 30 batches is worth more than any guide, including this one.


Christopher Garcia
%月 %日, %年
Excellent thread